Creating, Cloning & General Overview of the Main Dashboard
A guided look at the ExpoStudio admin console: the event list, how to spin up a brand-new event from scratch, how to clone an existing event in seconds, and how user roles and event-level access are configured.
1. Main Events Dashboard 00:00 – 00:11
The first screen on login — and the central hub for all events.
Narrator · 00:00 – 00:11 The first screen on login lets you see every current, past, and upcoming event from one central dashboard.
When you log into the admin console you land on the Find events screen. This is the master list of every event that exists in the organization, displayed as event tiles. Each tile shows the event logo, the event name, and the date range. The All / Upcoming / Past tabs at the top let you scope the list by time.
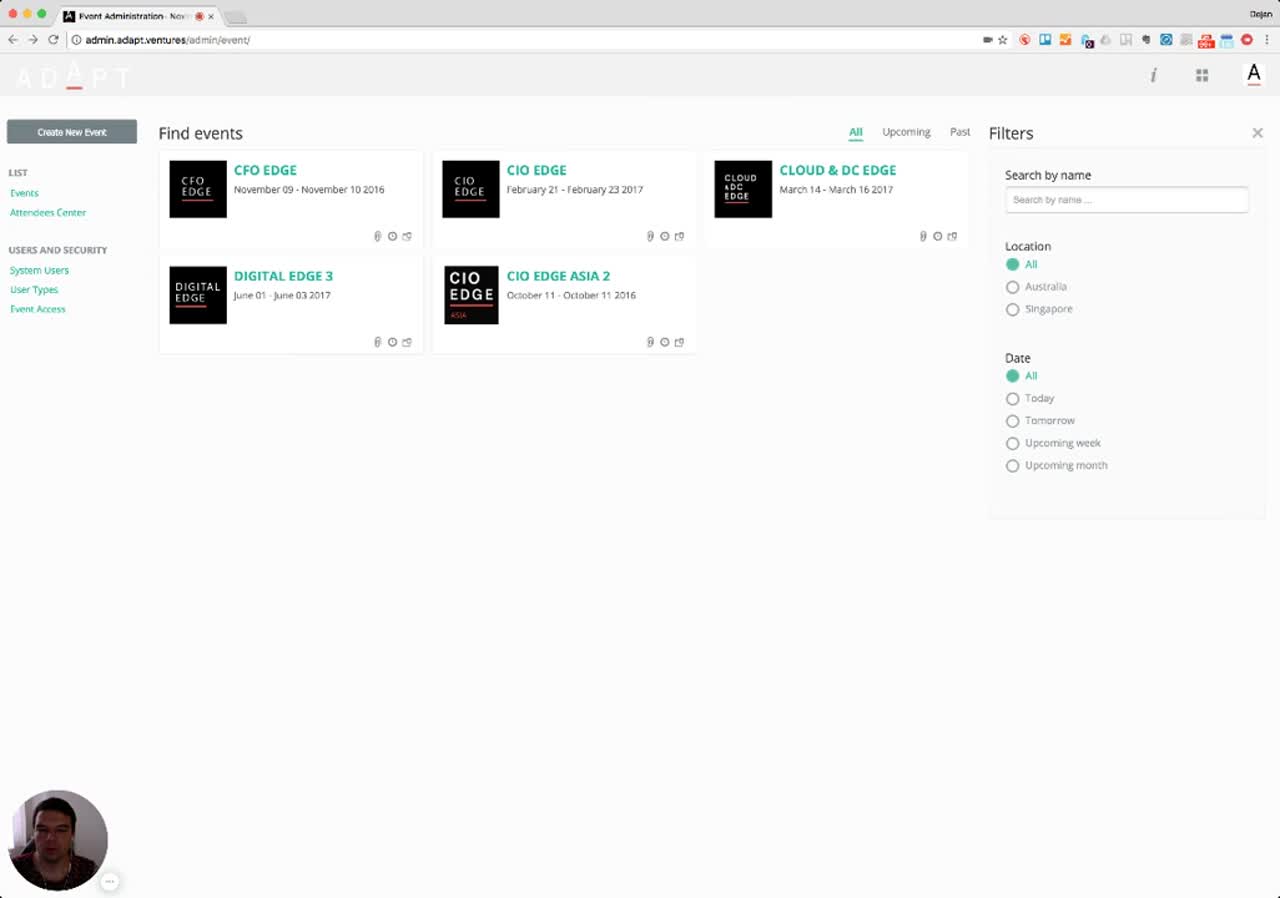
Key regions of the screen:
- Top-left action button — Create New Event launches the new-event wizard.
- Left navigation rail — grouped into List (Events, Attendees Center) and Users and Security (System Users, User Types, Event Access).
- Center grid — every event tile in the org, with quick-action icons in the lower-right of each tile.
- Top filter tabs — All / Upcoming / Past for time-based filtering.
- Right filter panel — Search by name, filter by Location, filter by Date (covered in §5).
- Top-right "i" icon — on-demand help, available from any screen (covered in §9).
2. Creating a New Event 00:11 – 00:25
A single short form is enough to spin up a fully working event shell.
Narrator · 00:11 – 00:25 You can create a new event, put the event name, the domain (sub-domain or sub-directory if applicable), choose the time zone and the start and end date — and you are good to go.
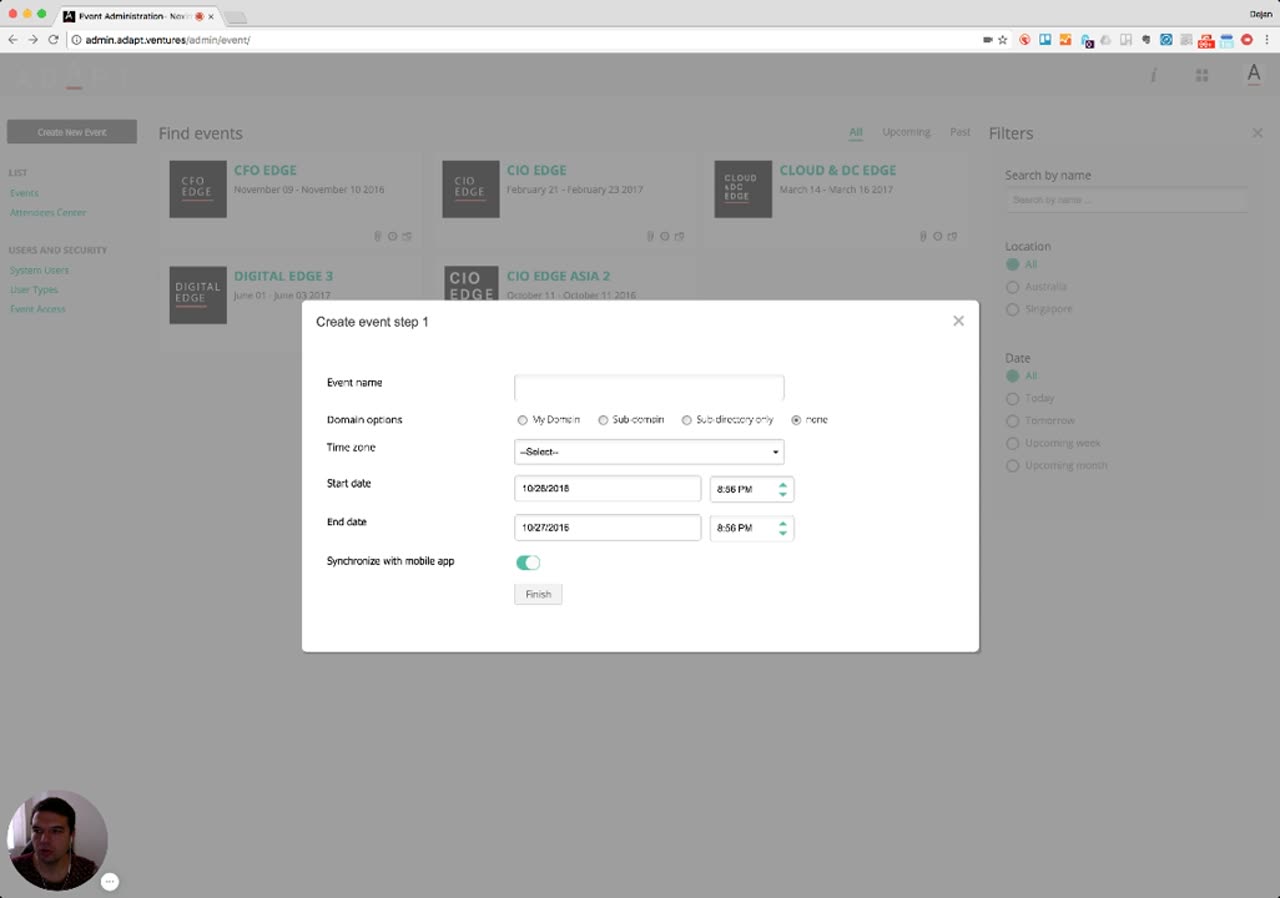
Clicking Create New Event opens the Create event step 1 modal. This is intentionally minimal — once these basics are in place the rest of the configuration happens inside the event itself.
| Field | What it controls |
|---|---|
| Event name | Display name shown across the admin console, attendee portals, and mobile app. |
| Domain options | How the public-facing site is hosted: My Domain, Sub-domain, Sub-directory only, or None. |
| Time zone | The event's anchor time zone — drives every scheduled item, deadline and notification. |
| Start date / End date | Event window. Each date is paired with a time picker. |
| Synchronize with mobile app | Toggle that publishes the event into the companion delegate / sponsor / staff mobile apps. |
Pressing Finish creates the event and returns you to the dashboard, where the new tile appears alongside the existing ones.

3. Cloning an Existing Event 00:25 – 00:44
Re-running a successful event? Don't rebuild — clone it.
Narrator · 00:25 – 00:44 If you have a successful event, you can click the clone button from the dashboard and clone everything — basic settings, meetings, participants, the data, the website — whatever you have selected from the platform.
Cloning is the fastest path when an event repeats. From an event tile, choose the clone action to open the Clone event dialog. The dialog lets you pick exactly which sections to bring forward, and shift to a new date window in a single step.
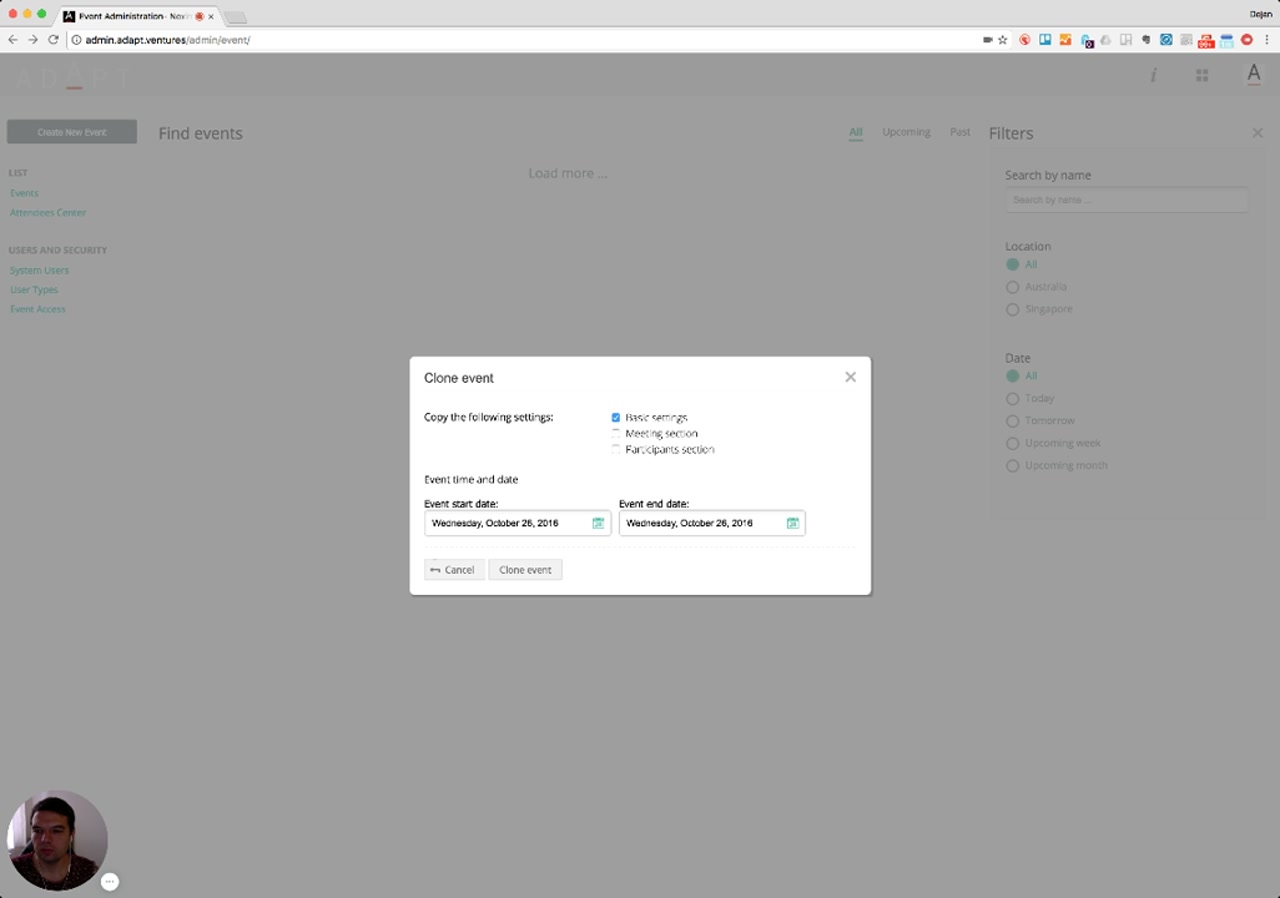
The clone is configurable — you select what to bring across. The visible toggles in this dialog are Basic settings, Meeting section, and Participants section, but the narrator notes the underlying capability is broader and covers "the meetings, participants, the data, the website — whatever you have selected from the platform." In other words, any structural component of a previous event is fair game; you choose how much of the previous event you want to inherit.
You also pick the new event start date and event end date. Confirm with Clone event; the dashboard refreshes with the new event ready to open.

4. Rescheduling an Event (with auto-reshuffle) 00:44 – 01:06
If the event date moves, the agenda and every session move with it.
Narrator · 00:44 – 01:06 The same goes for rescheduling the event. If something changes and you need to set a different date, you can reschedule — and it will automatically reschedule the agenda for the conference or event, and automatically reshuffle all the sessions.
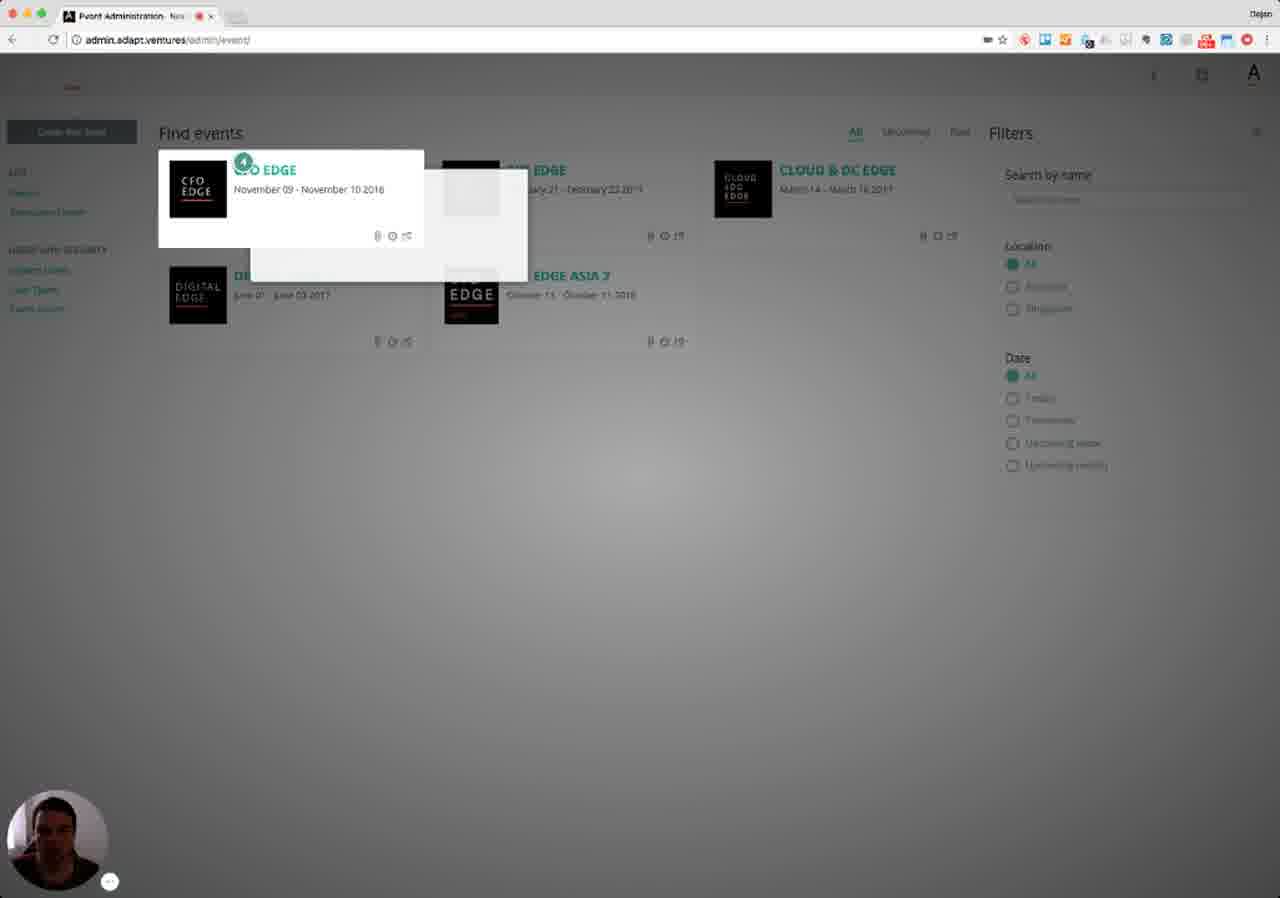
Rescheduling is exposed as a quick action on each event tile. Hovering surfaces a Reschedule event tooltip; clicking it lets the administrator pick the new date window for that specific event.
5. Filtering & Cross-Event View 01:06 – 01:25
The dashboard isn't just a list — it's an aggregation point across every event.
Narrator · 01:06 – 01:25 From this central dashboard — if you have different geo-locations and a lot of events — you can filter by location or by date. You can have a preview of the central view of all the data you have across all events.
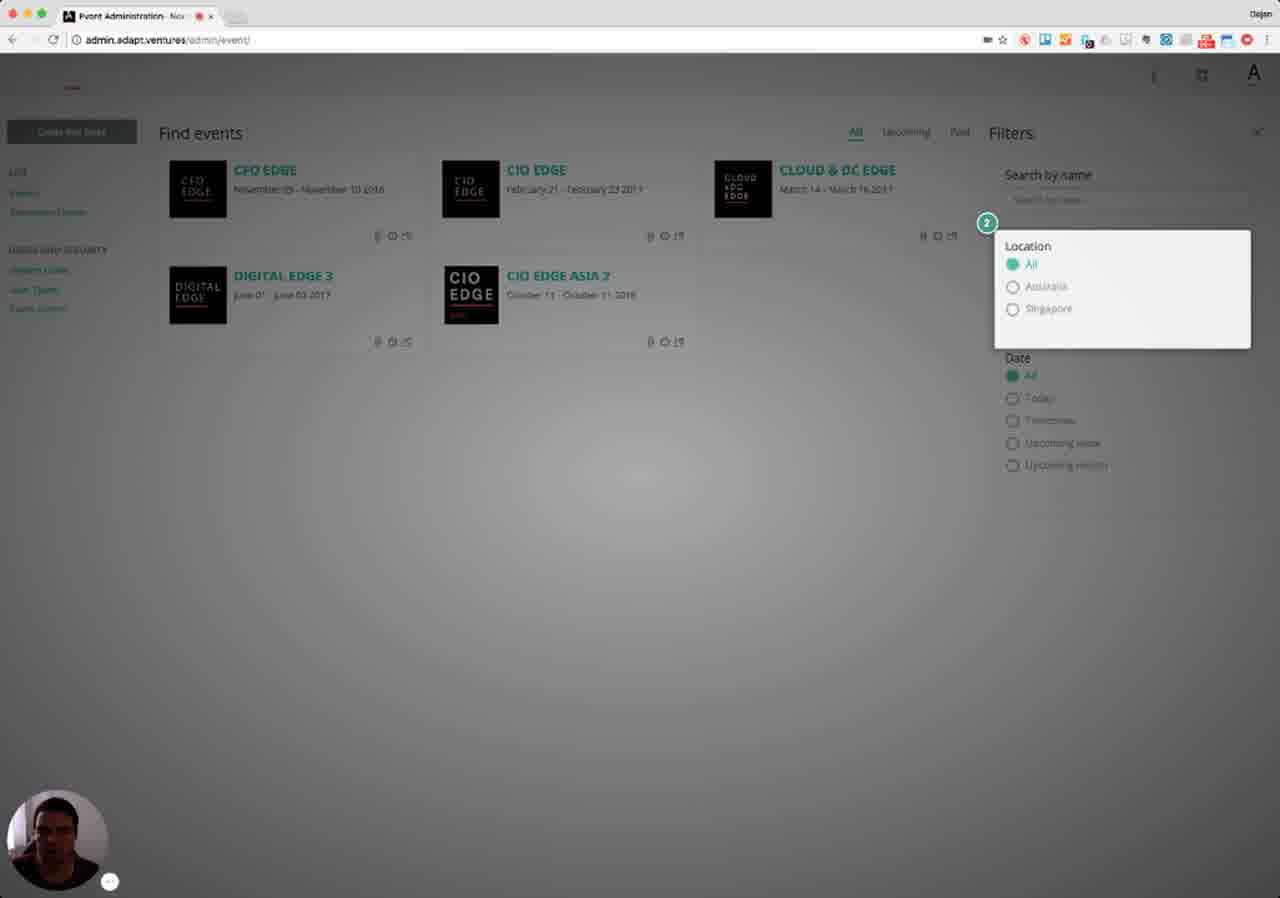
The right-hand Filters panel is what makes the dashboard work at scale. For organizations running many events across multiple regions, the filters narrow the visible tile set down to what's relevant right now.
- Search by name — free-text match against event names.
- Location — All / Australia / Singapore in this demo (the list reflects whatever locations the org's events span).
- Date — All / Today / Tomorrow / Upcoming week / Upcoming month.
- Top tabs — All / Upcoming / Past, applied independently of the right-rail filters.
Beyond filtering, the narrator describes the dashboard as a preview surface for cross-event data: it's the single place where an admin running multiple events at once can see the whole portfolio at a glance.
6. User Types 01:25 – 01:45
Customizable role definitions — administrators, marketing users, sales users, view-only, and any others you need.
Narrator · 01:25 – 01:45 You can see the system users who have access to the portal. Importantly, you can customize all the user types in the system — administrators, marketing users, sales users, view-only, and so on.
Selecting User Types from the left rail opens the permission-template list. The page introduction explains the purpose: "Set your organization's hierarchy and define what permissions each user has in the system. Using this page create multiple user types, assign different levels of permissions for each user type, allow or prevent users from using some features."
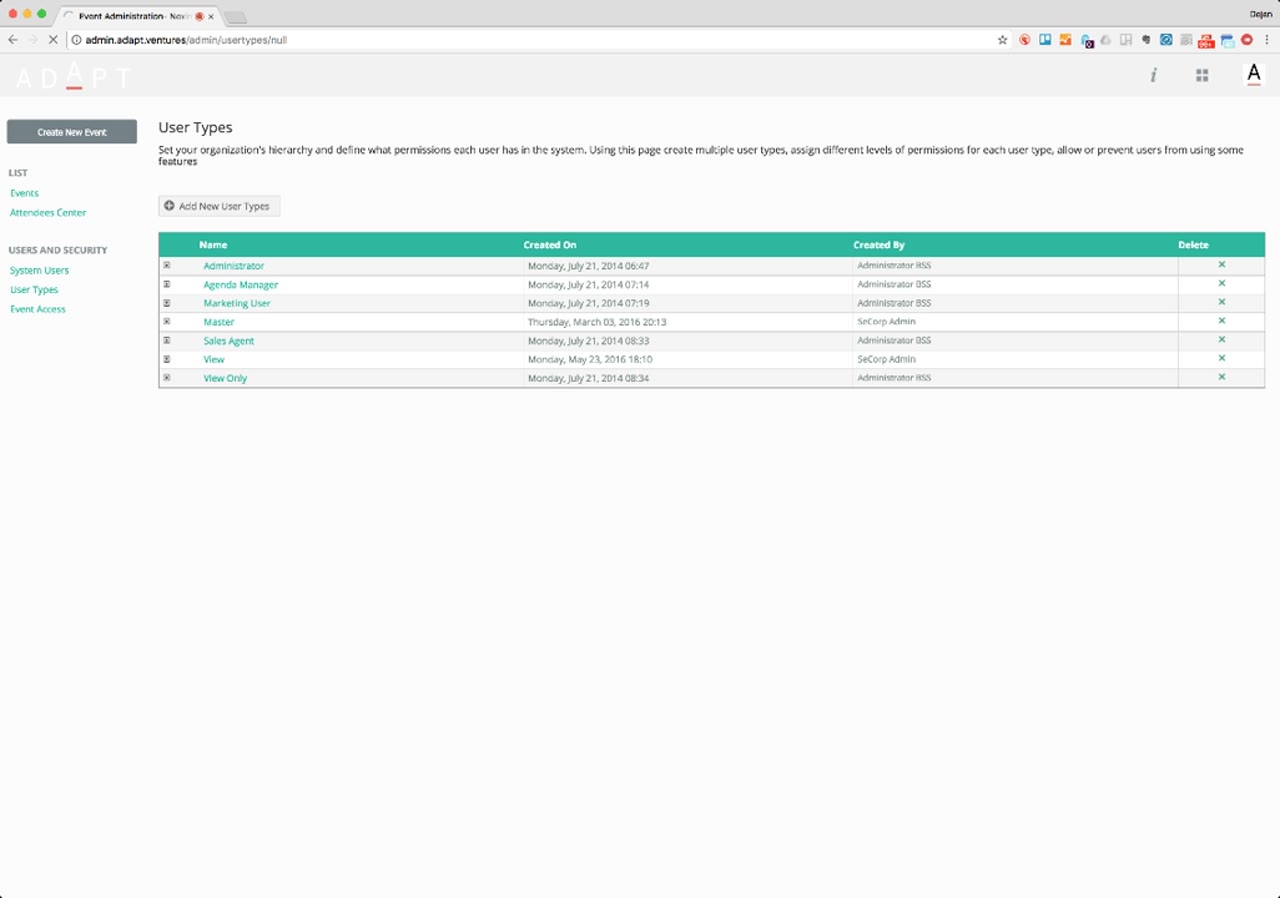
Click + Add New User Types to define a new role, or click any existing row to open it for editing.
7. Permissions Drill-Down 01:45 – 02:17
Click into any user type for fine-grained control — down to form level and data level.
Narrator · 01:45 – 02:17 If you click on a particular user type, it gives you a full overview — even the slightest details — of what each user type is allowed to do, from event organization to attendee management. There are rules and privileges you can assign to each type, and if you drill down it gives you options at the form level and the data level.
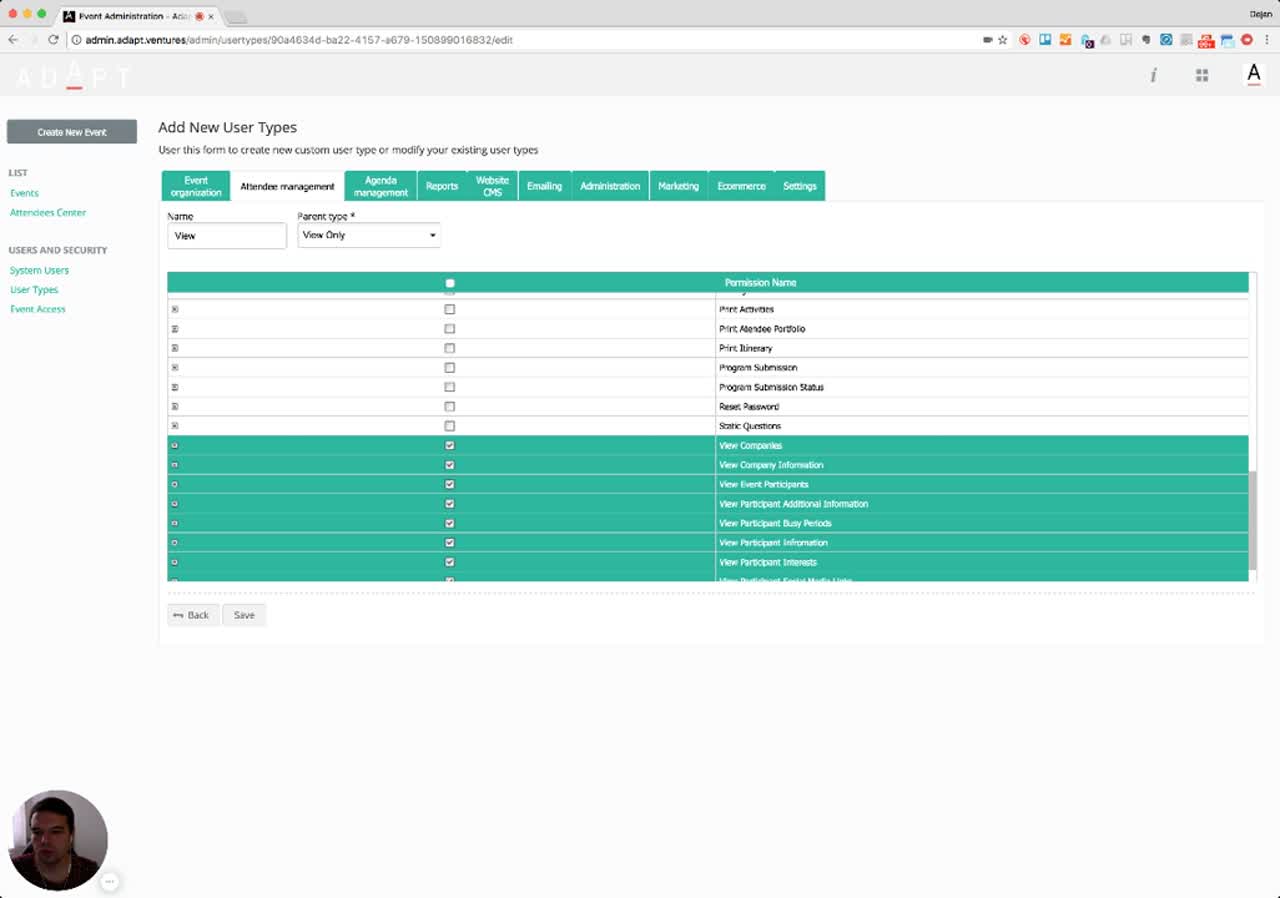
Opening a user type reveals the Add New User Types form. The role gets a Name and a Parent type (so new roles can inherit from a baseline like View Only). The bulk of the screen is a tabbed permission matrix.

The ten permission tabs:
- Event organization — creating and managing events, forms, and participant types.
- Attendee management — viewing and editing attendees, companies, busy periods, interests, social media.
- Agenda management — managing the event schedule.
- Reports — running and exporting reports.
- Website CMS — editing the public event website.
- Emailing — sending and managing email campaigns.
- Administration — system-level administration.
- Marketing — marketing tools.
- Ecommerce — payment and ticketing.
- Settings — global settings.
8. Event Access Management 02:17 – 02:38
Decide which staff members can work on which events — and scope even an admin to a single event if needed.
Narrator · 02:17 – 02:38 If you want to restrict access — for example an administrator, but only for a given event — you click on that user and add or remove the events you want them to have access to. That is the main dashboard of the portal.
The Event Access page in the left rail handles the second axis of security: not what a user can do, but which events they can do it in.
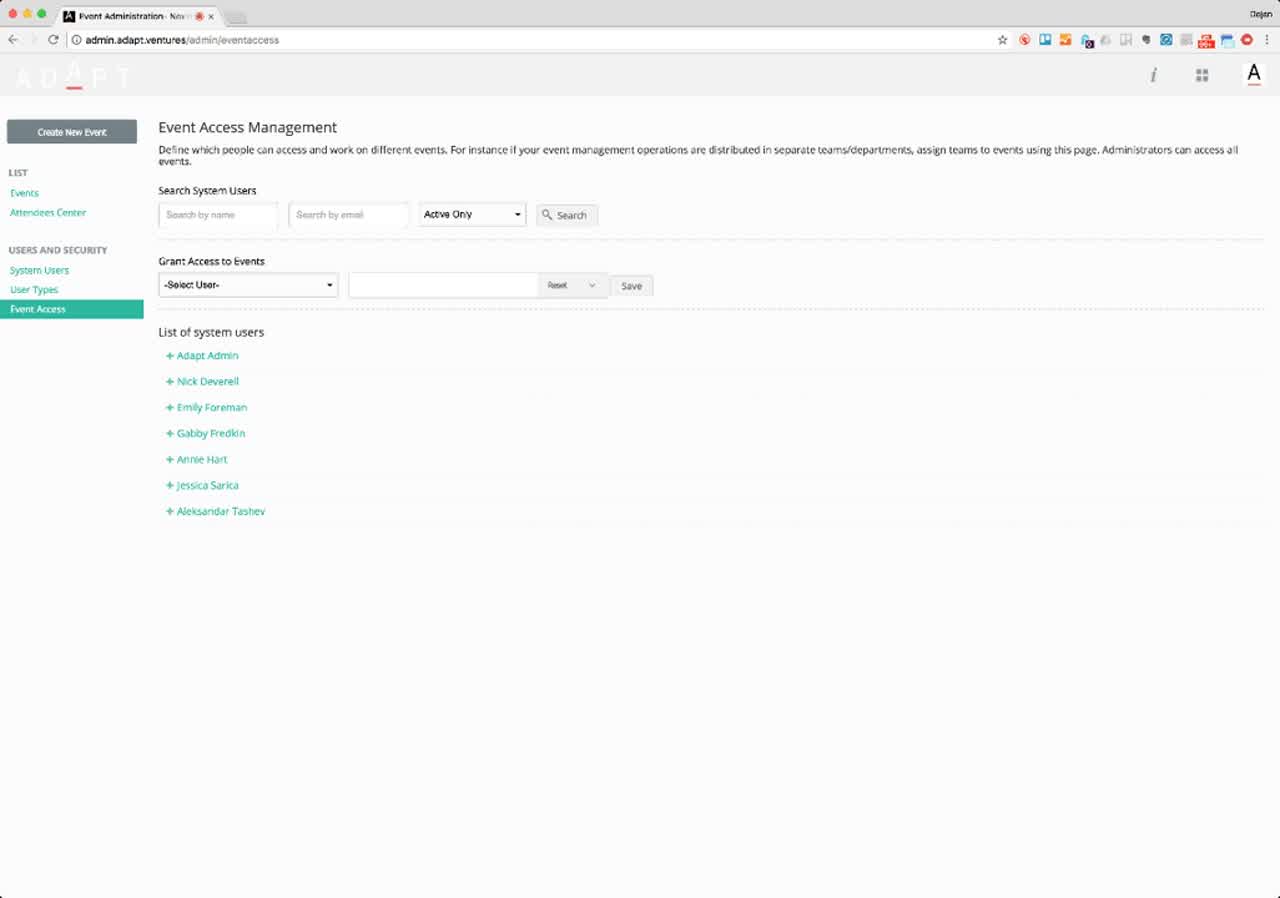
The page has three working areas:
- Search system users — by name or email, with an Active Only filter.
- Grant Access to Events — pick a user from the dropdown, select one or more events, and Save.
- List of system users — a roll-up of everyone in the system; expand any name with the
+control to inspect or edit their event-level access.
9. On-Demand Help (the "i" icon) 02:38 – 02:51
Stuck on a screen? Click the "i" icon at the top — guidance opens in place.
Narrator · 02:38 – 02:51 At any point, if you need guidance, you can click the "i" icon at the top and the system will give you guidance on all the important sections and how to navigate them.
The platform exposes contextual guidance through an "i" (information) icon visible in the top bar of every screen. Triggering it overlays numbered tooltips on the current page, walking the administrator through the key regions and what each does. The same mechanism is available on every screen — not only on first run.

The walkthrough is paginated with Skip / Back / Next controls, then closes back to the normal screen. Because it lives behind a persistent icon, it functions as embedded help rather than a one-time onboarding flow.
10. Essence & Takeaways
The one-paragraph version
The ExpoStudio admin console centers on a master Find events dashboard where every event in the organization lives as a tile, filterable by location and date. Admins can spin up a new event from a five-field wizard, clone a successful event (basic settings, meetings, participants, data, website — whatever they pick) into a new date window, or reschedule an event with a single click — at which point the platform automatically rebuilds the agenda and reshuffles all sessions against the new dates. Security has two independent dimensions: User Types (a tabbed permission matrix that drills all the way down to form-level and data-level operations across event organization, attendees, agenda, reports, CMS, email, admin, marketing, ecommerce and settings) and Event Access (which staff — including admins — can act on which events). On-demand contextual help is always one click away via the "i" icon at the top of every screen.
- Onboarding documentation for new event administrators.
- A "what is ExpoStudio?" one-pager for sales / hosted-buyer pitches.
- A reference for whoever rebuilds or extends the events dashboard, role editor, or event-access UI.
- A QA checklist (every numbered section above maps to a screen and to a permission concept that needs to keep working).
11. Full Transcript
Verbatim narration provided alongside the video, segmented by timestamp.