Forms & Data Collection for Different Attendee Types
A walkthrough of the inside-event dashboard, then the heart of the platform's data-collection model: how forms are built once and re-used across attendee types — delegates, partners (sponsors), speakers, staff — both in the registration flow and in the logged-in client panel.
1. Inside-Event Dashboard 00:00 – 00:28
Once you open an event, you land on its own dashboard — the operational view for that event.
Narrator · 00:00 – 00:28 In this portion we discuss the main event dashboard once you're inside a particular event, and the first step of setting up the forms you'll use for data collection — structured by the types of users or attendees you'll have on your event, like sponsors or delegates.
Selecting an event tile from the master list (Module 1) drops you into that event's own dashboard. The URL changes to /admin/event/{id}/dashboard and a new event-scoped navigation appears in the left rail.
Event-scoped left navigation:
- Dashboard — what you're looking at now.
- Event Setup — high-level event configuration.
- Event Forms — central library of all forms in the event (the main subject of this module).
- Registration Process — wires forms into the public registration flow.
- Tickets — ticket / pricing tiers.
- Client Panel Setup — wires forms into the logged-in attendee experience.
- Event Plan — planning timeline (covered in Module 3).
The top toolbar adds an attendee/company search bar, a row of section icons (attendees, agenda, comms, settings, reports), the event logo, and the on-demand "i" help icon (introduced in Module 1).
2. Dashboard Widgets & KPIs 00:28 – 01:11
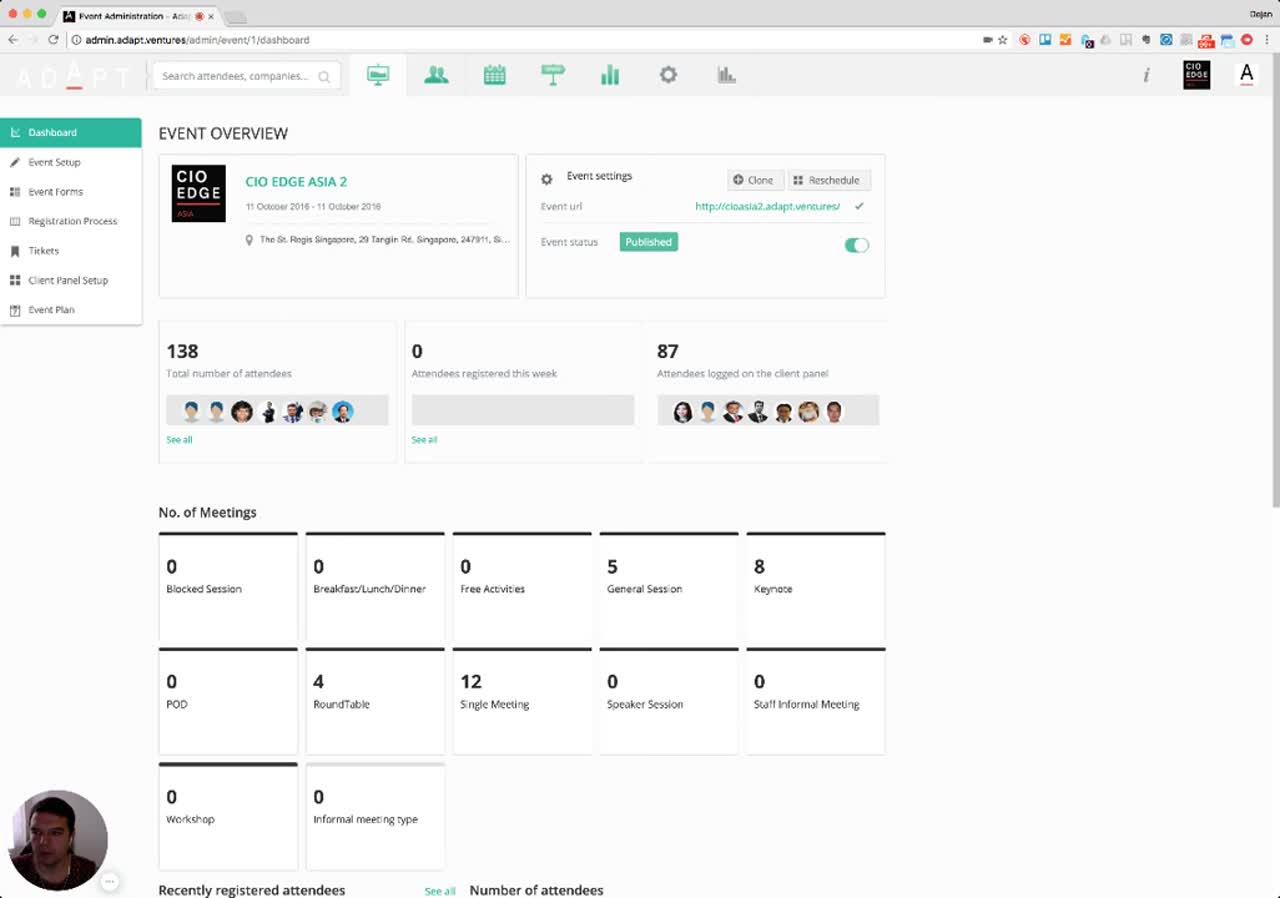
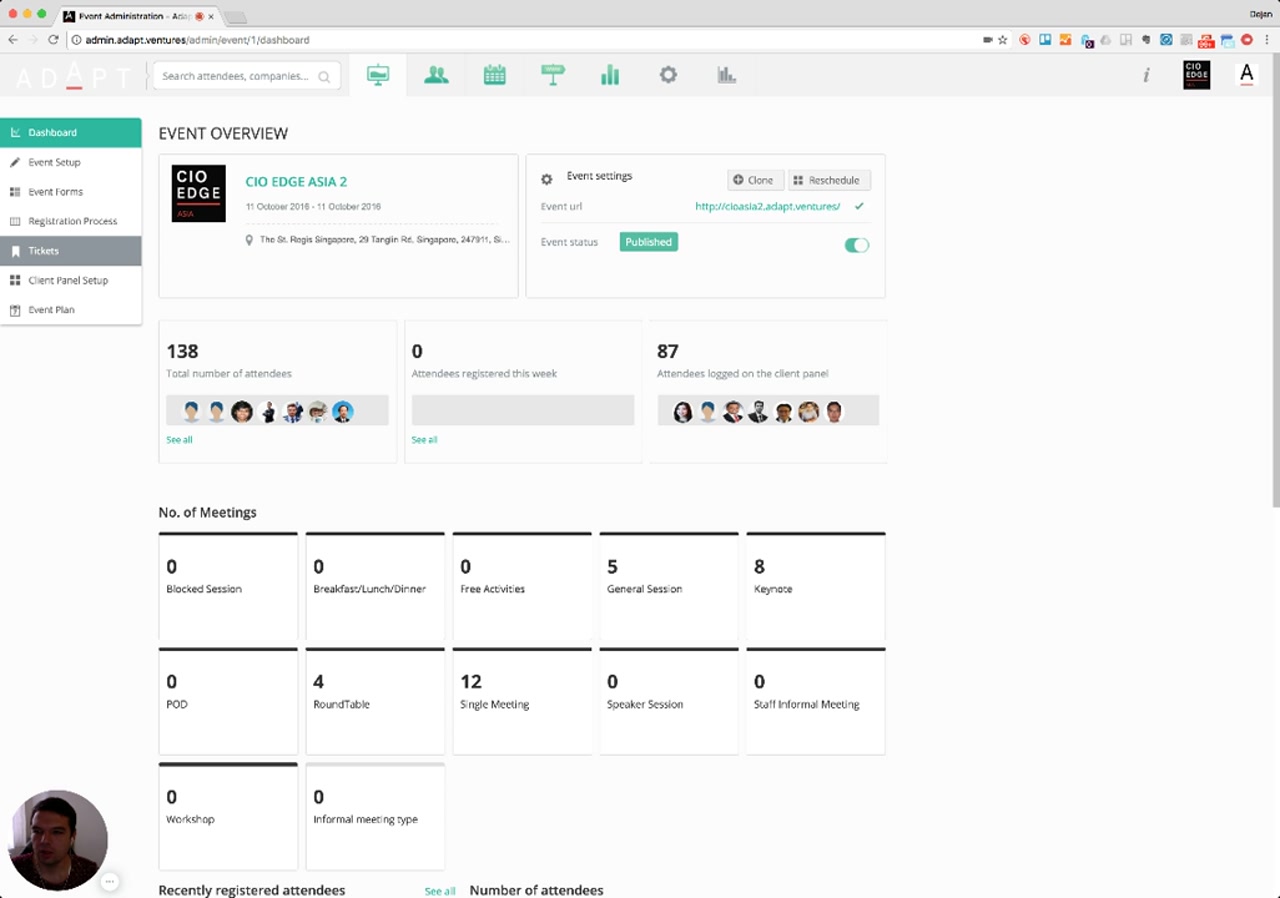
The dashboard surfaces the operational health of the event at a glance.
Narrator · 00:28 – 01:11 On this dashboard you have important information about the dates, the location, and — if you have a website — the domain where you publish all your content. There are important stats like the number of attendees, how many of them have logged in, statistics about the meetings you have scheduled, how many have completed their profile, their itinerary completion, and the top services and products your attendees are interested in.
The dashboard groups information into several stacked blocks:
| Block | What it shows |
|---|---|
| Event header | Event logo, name (CIO EDGE ASIA 2), date range, full venue address. |
| Event settings card | Public event URL, event status (Published / not), and inline Clone and Reschedule buttons — the same actions exposed on the master dashboard tile in Module 1. |
| Attendee KPIs | Three big-number cards: Total number of attendees, Attendees registered this week, Attendees logged on the client panel — each with avatar previews and a "See all" drill-in. |
| No. of Meetings | A grid of counters per meeting type — Blocked Session, Breakfast/Lunch/Dinner, Free Activities, General Session, Keynote, POD, RoundTable, Single Meeting, Speaker Session, Staff Informal Meeting, Workshop, Informal meeting type. |
| Recently registered attendees / Number of attendees | Lower-section panels (visible on scroll) summarising recent activity. |
| Profile / itinerary completion + top services and products | Per the narrator, the dashboard also surfaces profile completion %, itinerary completion %, and the top services and products attendees express interest in. |
3. Navigating to Forms 01:11 – 01:34
From the dashboard you can drill into any section — but the focus of this module is form setup.
Narrator · 01:11 – 01:34 You can navigate from any of these points to the appropriate sections — like managing the attendees or the meetings. But what I'd like to cover here is how you set up the forms you'll use for different attendees or participant types.
From the dashboard, the KPI cards and section icons are all clickable shortcuts (e.g., the attendee KPI takes you into attendee management). For this module, we follow the path through the left rail to Event Forms.
4. Event Forms — Central Form Library 01:34 – 02:02
All forms used across the event live in one library — re-usable on the client panel and in registration.
Narrator · 01:34 – 02:02 If I click on Event Forms, I have an option to manage all forms used on the portal — these are the forms you'll use on the client panels or on the registration form. As I'm clicking through, you can see these questions are bits and pieces that are partial.
The Event Forms page is the master list of every form built for this event. The page intro reads: "Use this section to build dynamic registration forms. Forms created here can be included in any registration process of any participant type."
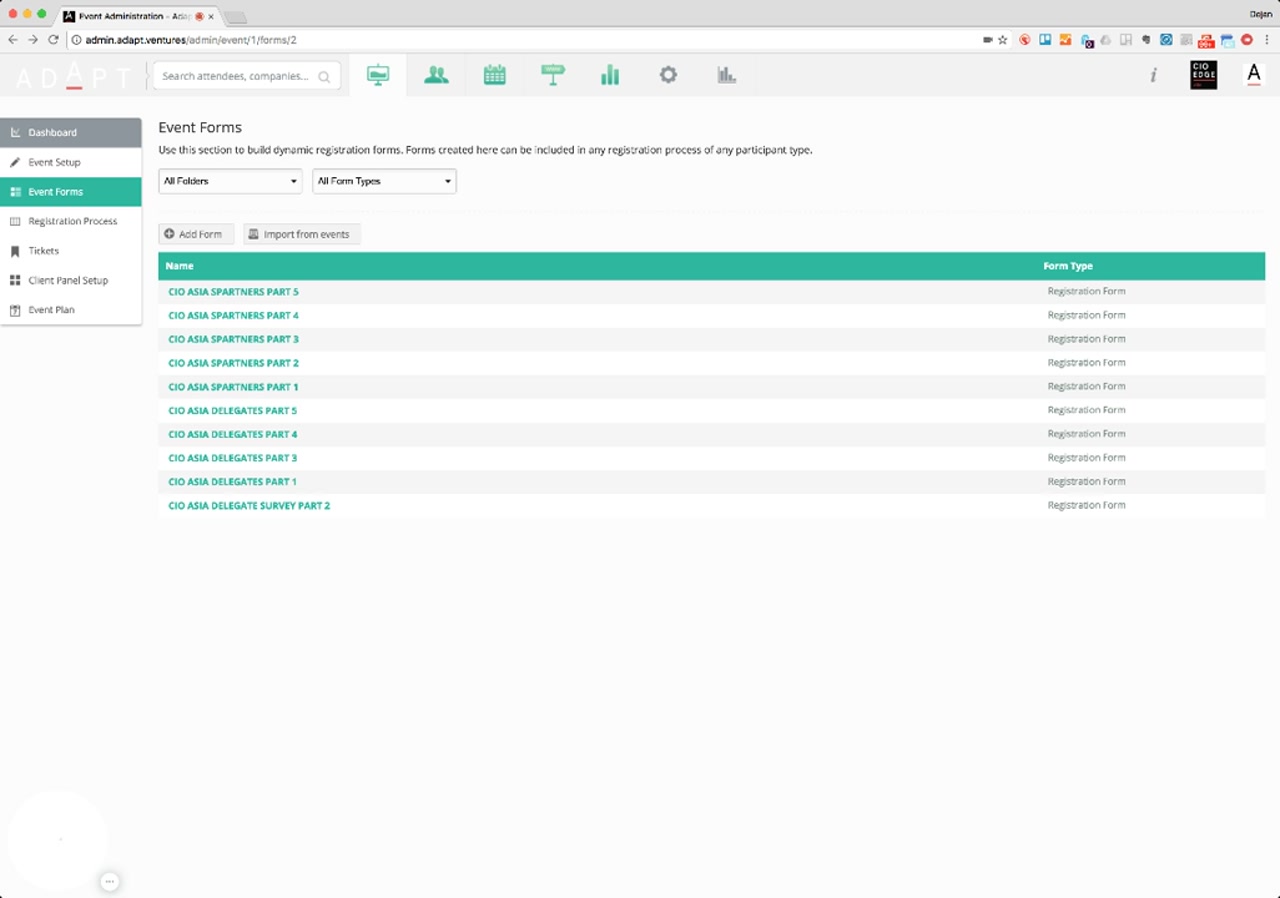
Page controls:
- All Folders — folder filter (forms can be organized into folders, e.g., per attendee type).
- All Form Types — type filter (Registration Form, Survey Form, etc.).
- + Add Form — create a new form.
- Import from events — pull a form definition over from another event in the org (useful when re-running an event).
- Name / Form Type table — listing of every form, click any row to open the builder.
5. Form Builder — Field & Form Settings 02:02 – 02:46
Click any form to open the builder. Each field has its own properties; the form itself has general settings.
Narrator · 02:02 – 02:46 You can click on each individual form. There are properties — for example, this is a form for "what are my five key tech strategies". If you click on a particular field, there are settings: whether it's bold, a help text for the user, or an internal description used only by your staff. You can manage all of that here. There are also general settings like the name of the form, the heading, and the folder to place it in. You can have different ones — for example, one for delegates and one for partners.
The form builder is split into three tabs in the left panel — Add a Field, Field Settings, and Form Settings — with a live preview of the form on the right.
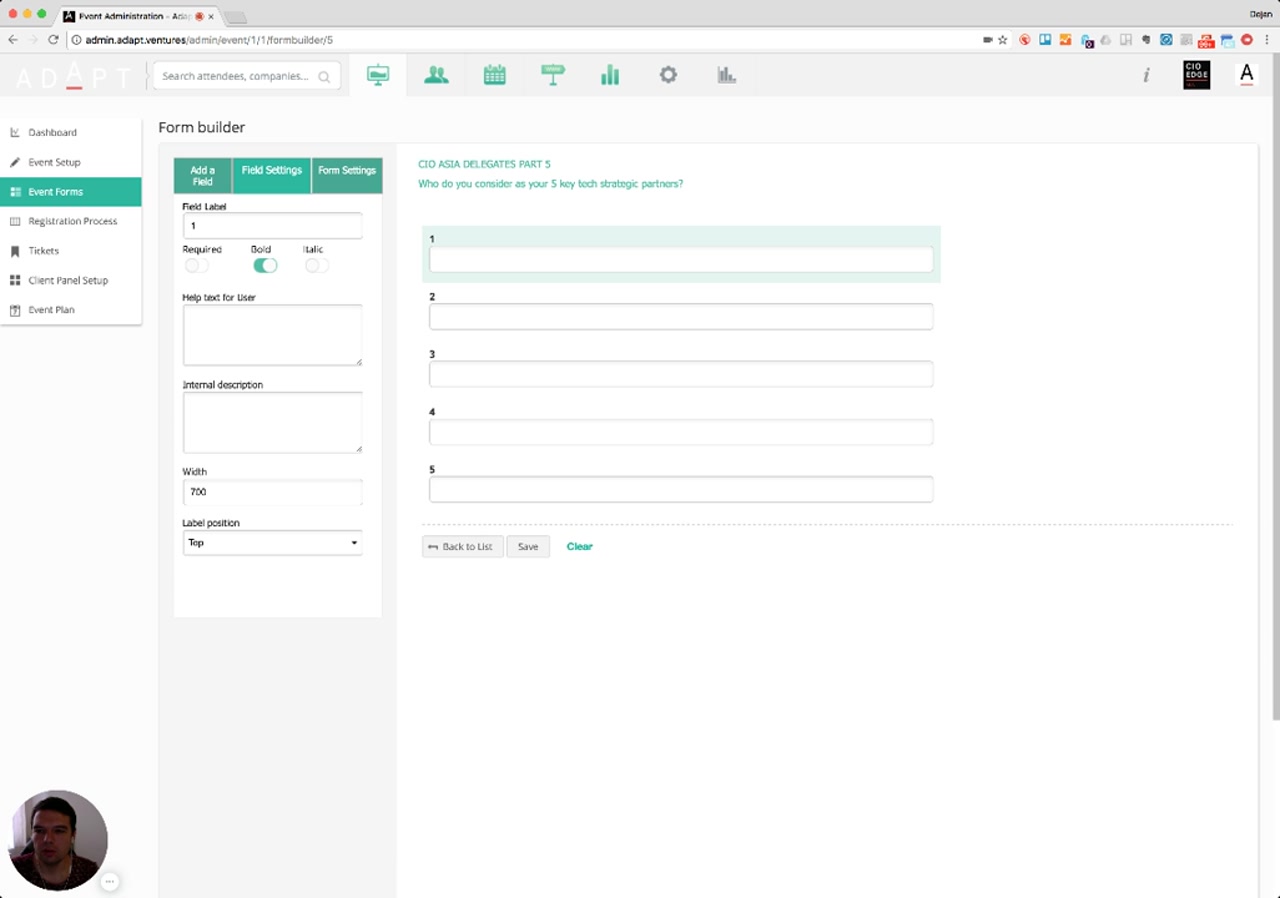
Per-field settings shown in the demo:
- Field Label — what the attendee sees next to the input.
- Required / Bold / Italic — three independent toggles for behaviour and styling.
- Help text for User — additional guidance shown to the person filling out the form.
- Internal description — only visible to staff in the admin console; useful for noting why a field exists or how to interpret answers.
- Width — pixel width of the field.
- Label position — Top / Left / etc.
The Form Settings tab covers the form-level properties the narrator mentions: name, heading, and the folder the form lives in. Folders are how you keep delegate-specific forms separate from partner-specific forms in the library.
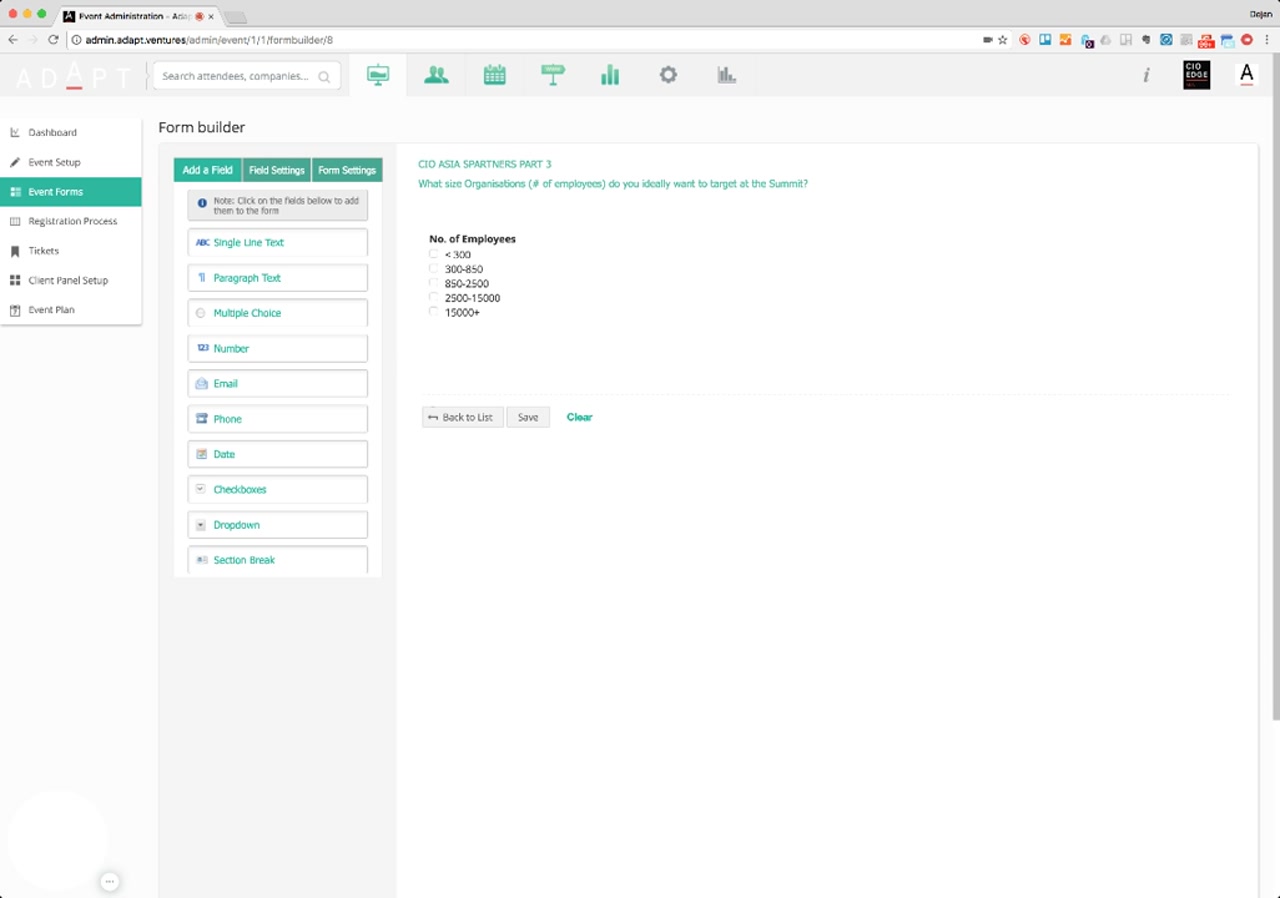
6. Field Types Available 02:46 – 03:13
The "Add a Field" tab lists every field type the platform supports.
Narrator · 02:46 – 03:13 As soon as you create all the forms — and by creating all the forms you have full flexibility to use any type of form — you can use multiple choices, email, phones, checkboxes, dropdowns, and everything else. Once you define them, they can then be used to set up the login or the registration process.
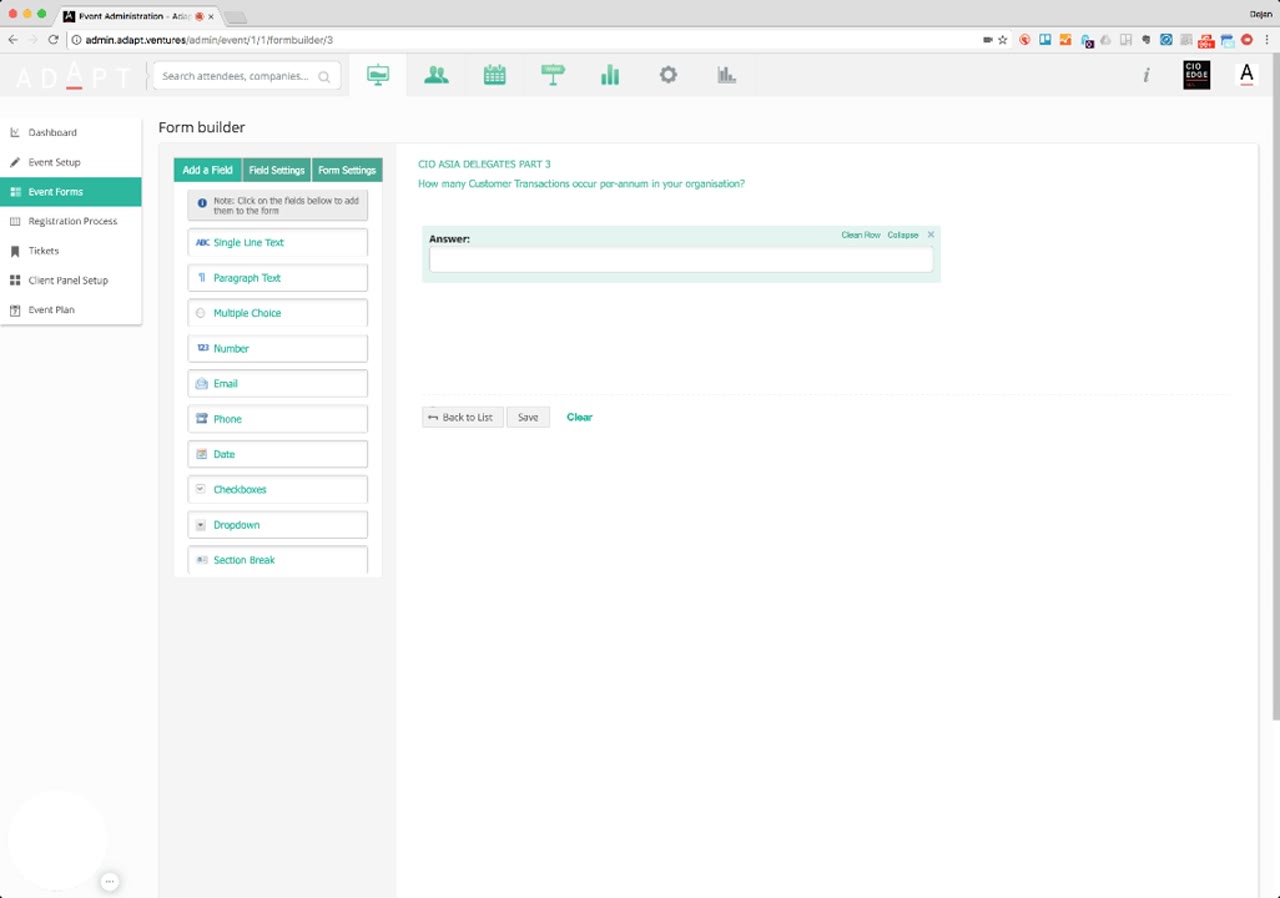
Available field types:
- Single Line Text — short free-form input.
- Paragraph Text — long-form free text.
- Multiple Choice — radio-style single answer with multiple options.
- Number — numeric input with validation.
- Email — email-validated input.
- Phone — phone-validated input.
- Date — date picker.
- Checkboxes — multi-select.
- Dropdown — single-select from a list.
- Section Break — visual separator between groups of fields.
Once forms are built, they become re-usable building blocks. The narrator's next point: the same form can be wired into either the public registration process or the logged-in client panel.
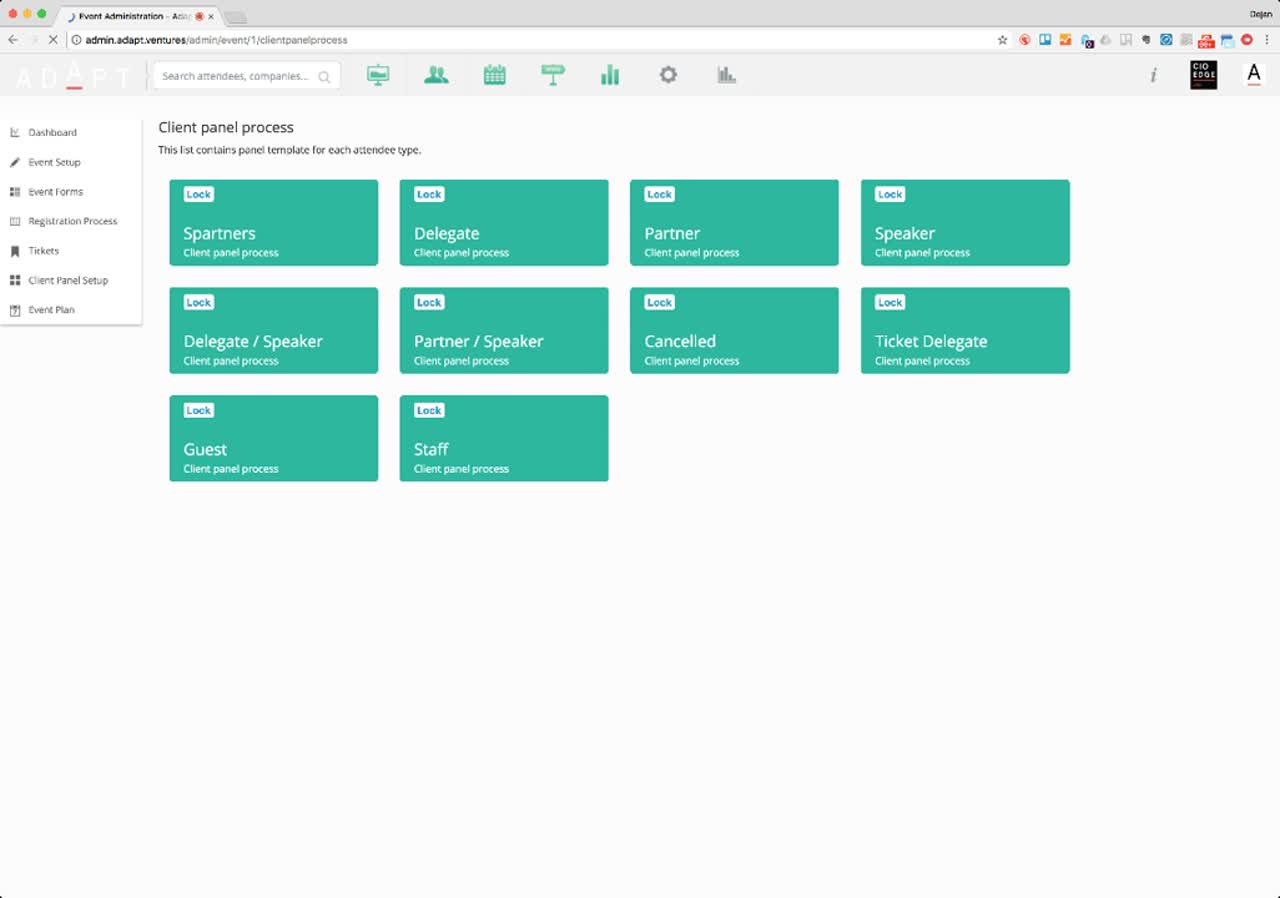
7. Client Panels & Drag-and-Drop Layout 03:13 – 04:05
Each attendee type gets its own client panel, assembled from the forms you built.
Narrator · 03:13 – 03:52 One form can be used by several types of users. This is the client panel you set up — when your attendees are logged in, you define all the forms used. They're outlined here, and you can reshuffle and regroup them with drag-and-drop, and the forms will be reorganised.
The Client Panel Setup section in the left rail opens the Client panel process page — one panel template per attendee type.
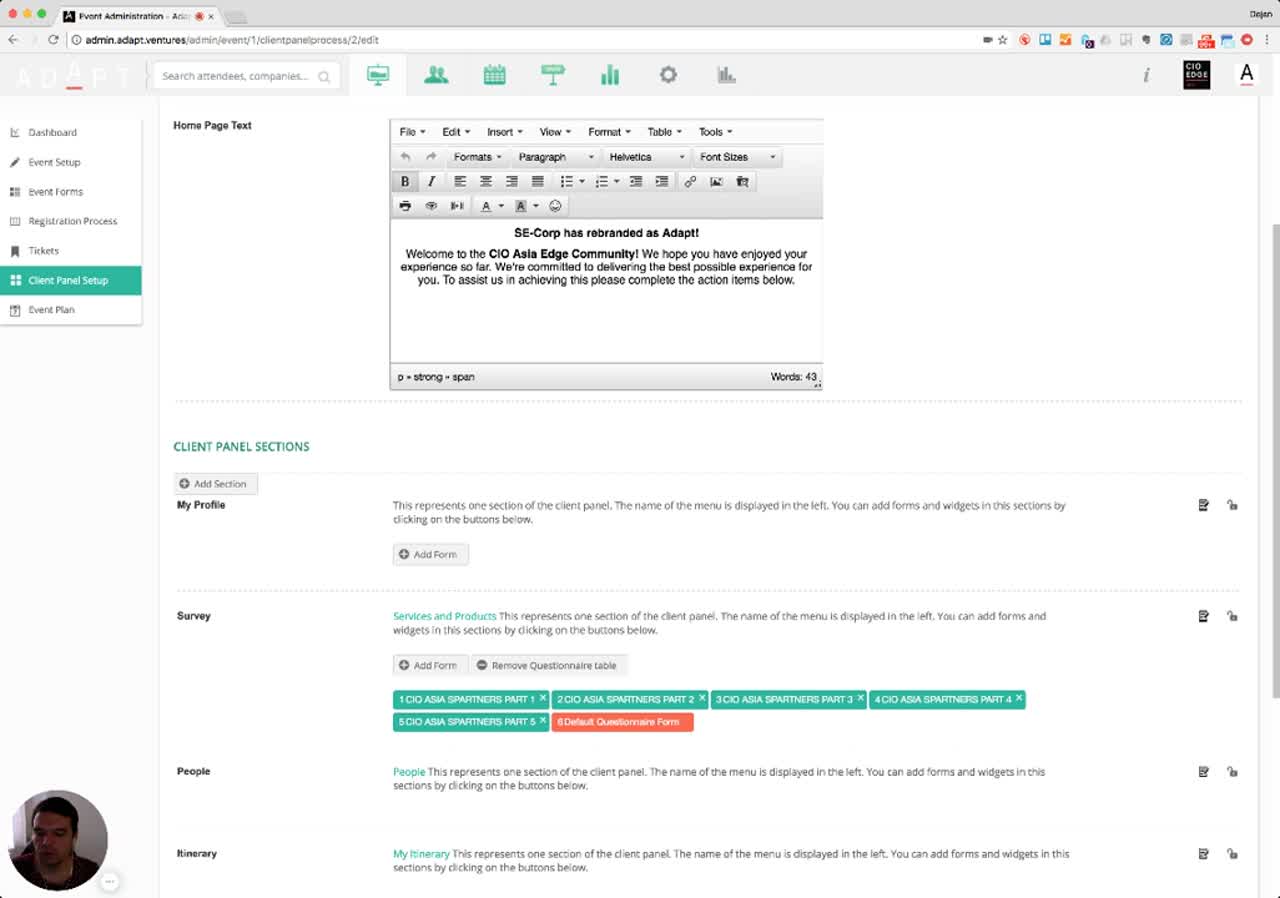
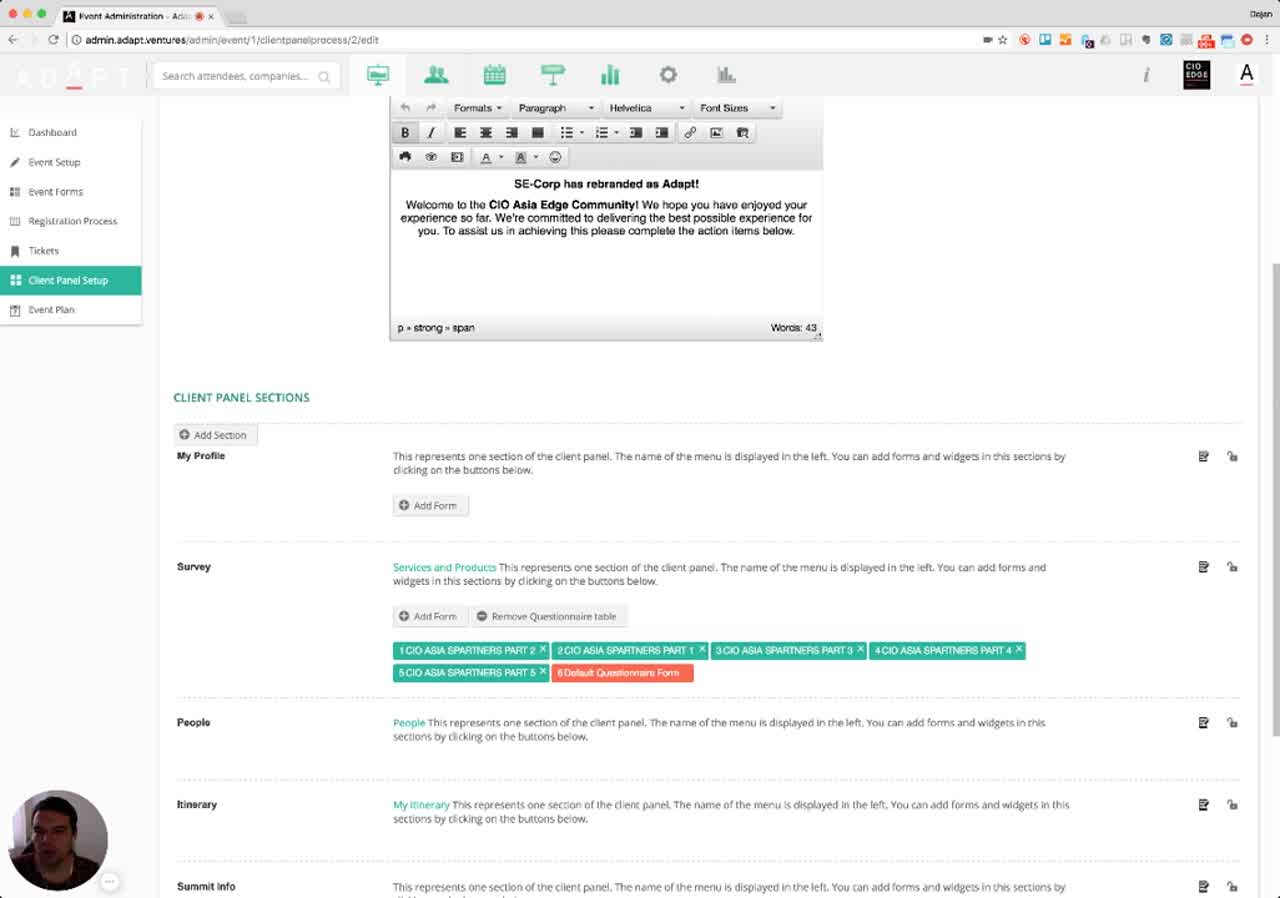
Opening a panel template (e.g., the Spartners client panel) takes you to its editor. The editor has two big areas:
- Home Page Text — a rich-text WYSIWYG (familiar TinyMCE-style toolbar) for the welcome content the attendee sees on login.
- Client Panel Sections — the actual menu of the logged-in experience: My Profile, Survey, People, Itinerary, Summit Info, etc. Inside each section you attach one or more forms via + Add Form.
Narrator · 03:52 – 04:05 That's how you create the forms and how you define different client logins — or even different registration processes — for all of your main attendees provided in here.
Client panels and registration processes are molecules. Each one is composed of forms (atoms) you arranged in order, per attendee type.
The same form (atom) can appear in multiple molecules — change the form once and every panel using it gets the update.
8. Essence & Takeaways
The one-paragraph version
Once you open an event you get an inside-event dashboard with attendee, login, meeting, profile-completion, itinerary-completion and "top services & products" KPIs — plus a left rail dedicated to that event (Dashboard, Event Setup, Event Forms, Registration Process, Tickets, Client Panel Setup, Event Plan). The data-collection model is split: Event Forms is a central library of small, modular forms (deliberately broken into PART 1 / PART 2 / etc.); the form builder offers ten field types (Single Line / Paragraph / Multiple Choice / Number / Email / Phone / Date / Checkboxes / Dropdown / Section Break) plus per-field settings (Required, Bold, Italic, Help text for users, Internal description for staff, width, label position) and per-form settings (name, heading, folder). Those forms are then assembled into per-attendee-type client panels (Spartners, Delegate, Partner, Speaker, etc.) and into the Registration Process — both via drag-and-drop ordering of forms inside named sections (My Profile, Survey, People, Itinerary, Summit Info…). The same form atom can be reused by any number of attendee types.
- Internal training for whoever builds forms or designs new attendee experiences.
- Documentation handed to clients on "what kind of data we can capture and where."
- A reference for whoever rebuilds or extends the form-builder UI, client-panel editor, or registration flow.
- A template for naming conventions (the PART 1/PART 2 split, attendee-type prefixes, folders).
9. Full Transcript
Verbatim narration provided alongside the video, segmented by timestamp.