Event Plan Automation — Deadlines & Checklists
Once forms and attendee types exist, the Event Plan stitches them into a time-aware playbook: ordered steps with due dates, visibility windows, optional reminder announcements, and per-attendee-type page-level scoping — so every participant knows what to do, when, and only sees the parts that apply to them.
1. Why an Event Plan? 00:00 – 00:54
A plan is the contract between you and your attendees: who needs to do what, by when.
Narrator · 00:00 – 00:20 As soon as you define the forms and your different attendee types, you can proceed to setting up the event plan — the event automation for your event.
Narrator · 00:20 – 00:54 The point is that you create all the steps and important dates for your event so you have a suitable game plan: what each participant needs to do, and the order they need to do it in, for a successful event.
The Event Plan is the orchestration layer of the platform. Modules 1 and 2 set up the building blocks (an event, attendee types, forms). This module sets the schedule and scope that turn those blocks into a sequenced experience for each participant — automatically opening sections, due-dating actions, and (optionally) sending reminder announcements.
2. The Hosted-Buyer Sequence 00:54 – 01:43
A premium hosted-buyer event has a specific sequence — delegates first, then sponsors, then matchmaking.
Narrator · 00:54 – 01:26 For example, in our case — a premium hosted-buyer type of event — you want a date when the delegates go in and put their important details: what they want to see, what they want to attend, and their main business objectives.
Narrator · 01:26 – 01:43 Then, after that date, you put your sponsors in. Based on the data the delegates provided, sponsors do their submission and their preferences. Once that is finished, you have the data and preferences gathered to actually move on to scheduling and delivering the meetings at the event.
3. The Event Plan Page 01:43 – 02:00
Every step of the event lives here, with its action label, due date and visibility window.
Narrator · 01:43 – 02:00 In this example you can see the plan: complete your profile, then access the onsite app, then complete your survey, then complete your company information — and you can see that everything is attached with dates.
Open Event Plan in the left rail. You get a chronological table of every step in the event with three columns — Action, Due Date, Date (the visibility window) — and three filters at the top.

Reading the table:
- Action — the user-facing label for the step (in caps in the demo).
- Due Date — the deadline, with a clock time.
- Date — the visibility window (Visible From → Visible To). The step appears in the attendee's client panel only inside that window.
Top filters — narrow the table to show steps that apply to a specific attendee type, or steps inside a given visibility window. Useful for sanity-checking the plan from the perspective of "what does a Delegate actually see?".
4. Editing a Step 02:00 – 02:44
Click any row to open the Edit Step modal — the heart of the plan.
Narrator · 02:00 – 02:22 If you go on a particular one you can see what it looks like. So one would be completion of the profile, then access to the onsite app. There is the possibility to put explanations — as you'll see afterwards when we log in as an attendee to that event.
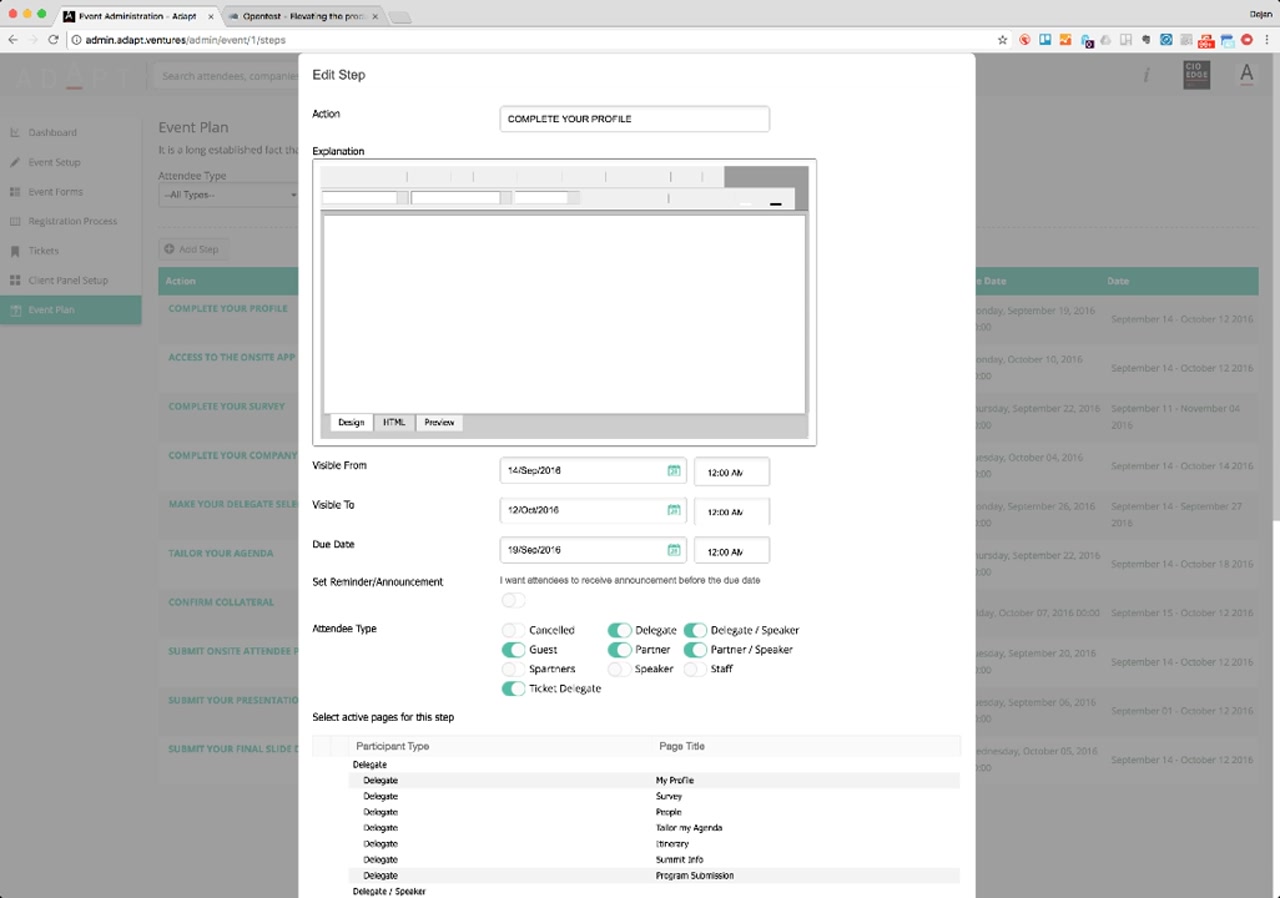
| Field | What it controls |
|---|---|
| Action | The label the attendee sees in their client panel checklist (e.g., "COMPLETE YOUR PROFILE"). |
| Explanation | Rich-text body shown to the attendee inside the step. Has Design / HTML / Preview tabs. |
| Visible From / Visible To | Date + time window during which this step appears in the attendee's checklist. |
| Due Date | The deadline shown to the attendee and used for sorting / nudging. |
| Set Reminder/Announcement | "I want attendees to receive announcement before the due date" toggle. Optional — turn on to nudge. |
| Attendee Type | 10 toggles — one per attendee type. Determines whose plan this step belongs to. |
| Select active pages for this step | Per-attendee-type checklist of which client-panel pages should be enabled for this step (covered in §6). |
5. Step Explanation Shown to Attendees 02:22 – 02:44
The Explanation field becomes the in-panel description the attendee reads before they act.
Narrator · 02:22 – 02:44 And there is a description which is given to the client panel when they log in — "this is the first and crucial step of the matchmaking." Then you set when it is visible from, what is the due date and time, and to which attendees this applies — like Delegate, Delegate Speakers, and Partners.
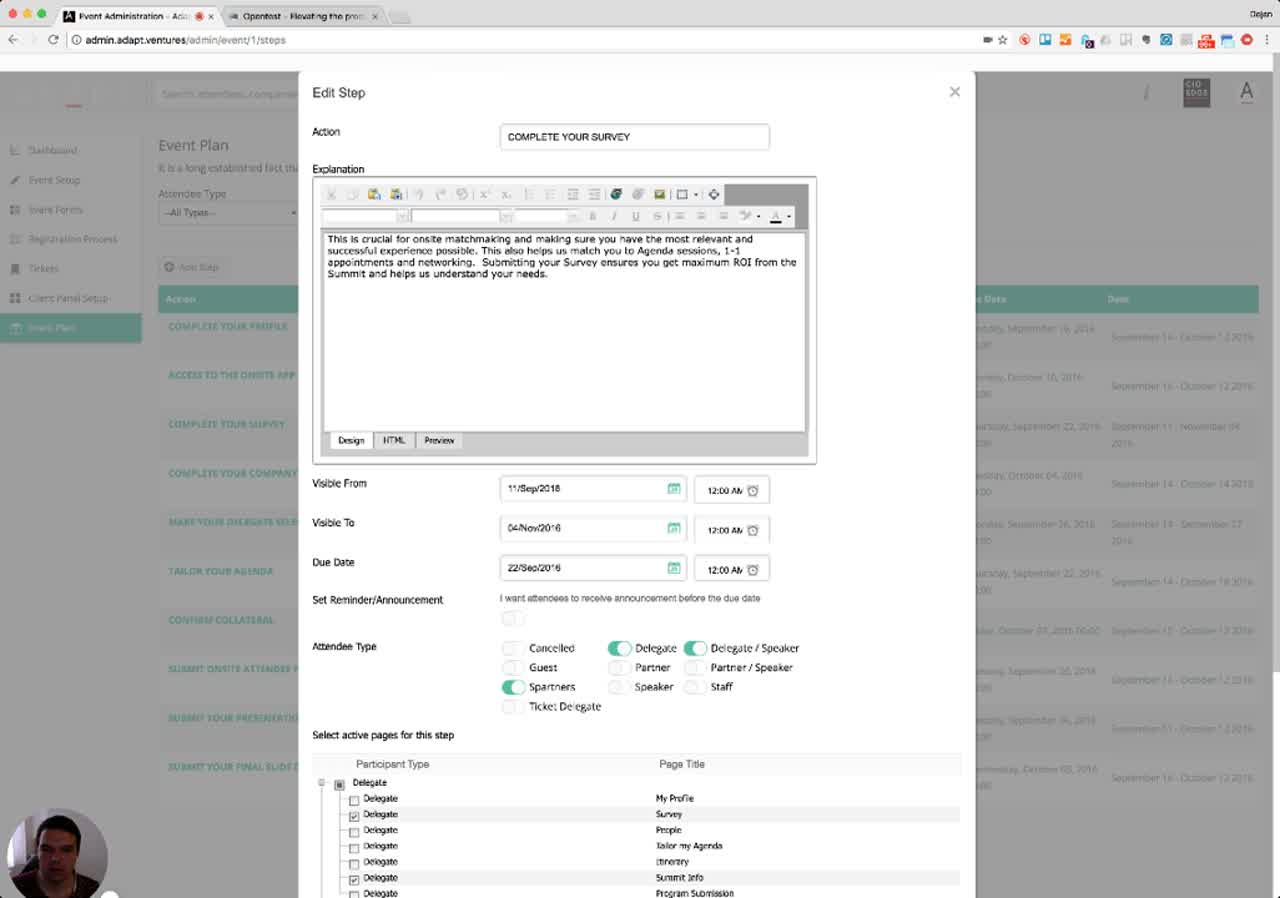
For this step the dates are: Visible From 11/Sep/2016, Visible To 04/Nov/2016, Due Date 22/Sep/2016. The attendee-type toggles enable Delegate, Delegate / Speaker, and Spartners — i.e., this particular step is owned by those three groups; everyone else won't see it in their plan.
6. Per-Attendee-Type Page Scoping 02:44 – 03:13
A single step can show different client-panel pages to different attendee types.
Narrator · 02:44 – 03:13 From here you can select which sections are enabled — the rest, which are unticked, are unavailable to that participant type. So the partners can see the Survey and People, while the delegates cannot see the People section, and delegates can see Summit Info which is not available to the partners.
The bottom of the Edit Step modal contains the Select active pages for this step table. It lists every (Participant Type → Page) combination as a checkbox. Tick the pages that should be available to that participant type during this step; leave the rest unticked to hide them.
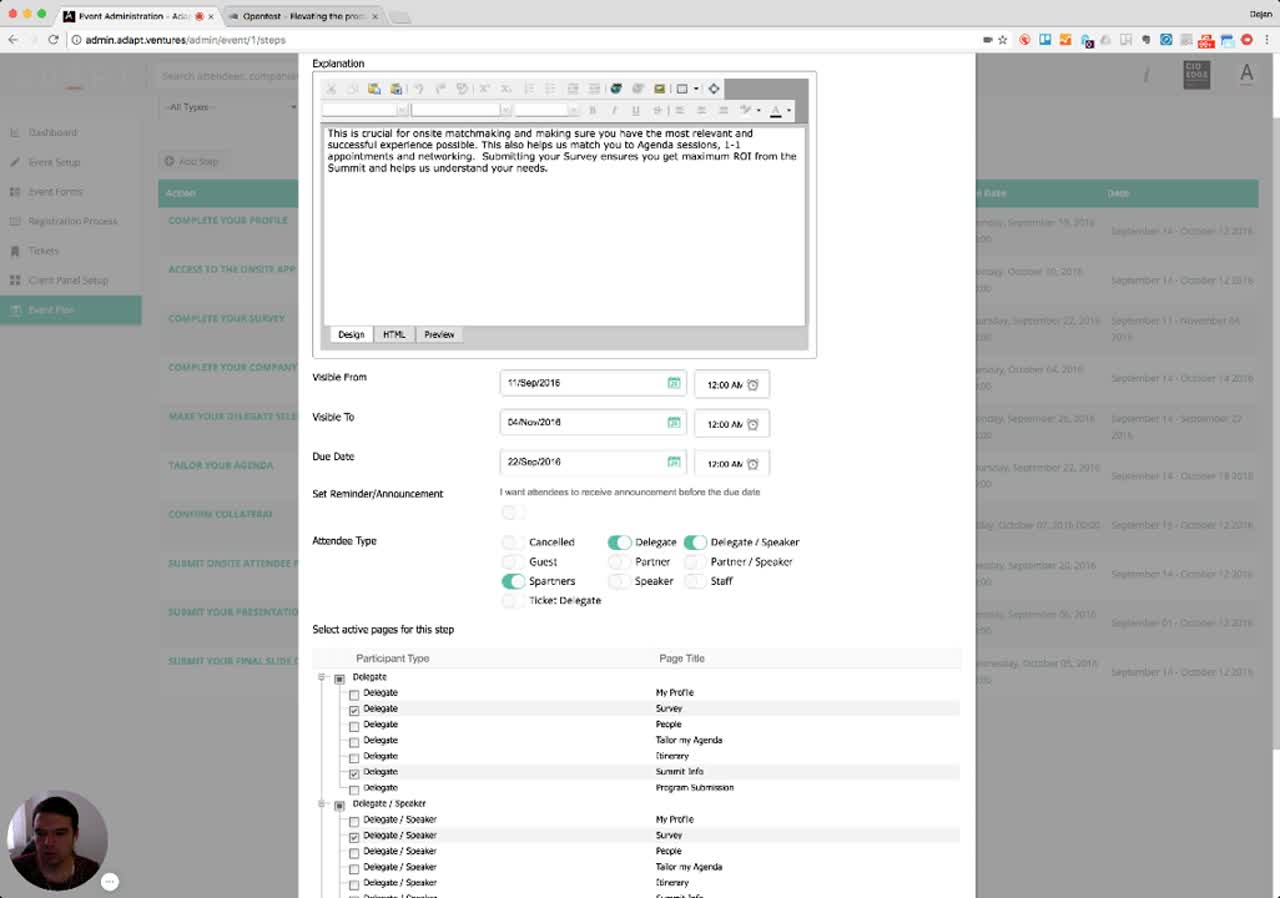
How to read this table:
- Each Participant Type (Delegate, Delegate / Speaker, Partner, etc.) gets its own block of rows.
- Each row inside a block represents a Page from that participant type's client panel (My Profile, Survey, People, Tailor my Agenda, Itinerary, Summit Info, Program Submission, …).
- A ticked checkbox means the page is enabled for that participant during this step. Unticked = the page is hidden from that participant during this step.
7. Why This Matters 03:13 – 03:39
A well-built Event Plan turns a chaotic event into an automated, on-time pipeline.
Narrator · 03:13 – 03:39 By having all these steps you secure a good flow of information and you make sure all attendees are doing what they should be doing at a given time, in order for you to organize and deliver on the promises given for that event.
The Event Plan ties together everything from the previous modules:
- Forms (Module 2) are surfaced inside specific client-panel pages.
- Pages are scoped to specific attendee types via the page-selection table here.
- Steps turn pages on and off according to a date window, with a deadline and an optional reminder announcement.
Net effect: each participant sees a personalized, time-driven checklist. The platform takes care of opening the right pages, hiding the rest, and (optionally) chasing the participant before each due date.
8. Essence & Takeaways
The one-paragraph version
The Event Plan is a sequenced list of steps that every event runs through, anchored to dates. Each step has an action label, a rich-text Explanation shown to the attendee, a Visible From / Visible To window, a Due Date, an optional reminder announcement, and three layers of scoping: it applies to specific attendee types (10 toggles — Delegate, Partner, Speaker, Spartners, Staff, etc.), and within each attendee type it enables specific client-panel pages (My Profile, Survey, People, Tailor my Agenda, Itinerary, Summit Info, Program Submission, …). For a hosted-buyer event the canonical sequence is: delegates first declare needs and objectives → sponsors review and submit their preferences → matchmaking and meeting scheduling → on-site delivery. The Event Plan is what makes that sequence happen automatically rather than depending on the operations team chasing attendees by email.
- A standard Event Plan template you reuse across hosted-buyer events.
- Onboarding for whoever sets up the timeline of a new event.
- A reference for client conversations: "this is how we make sure your delegates and sponsors do what they need to, when they need to."
- A QA checklist when cloning an event (Module 1) — every step's dates, attendee toggles and page-scoping must be re-validated for the new dates.
9. Full Transcript
Verbatim narration provided alongside the video, segmented by timestamp.